(Originally posted 2018-10-13.)
About 18 months ago I built some automation on Mac that I found rather handy. Since I mentioned it on various forums people have wanted it – or at least to know how I built it.
Given its extensibility as a method, it seemed more appropriate to dedicate this post to how to build.
An Example
Here’s an example of this automation in action.
Suppose you are typing text in an editor and you want to uppercase a portion of it. You would select the text with the cursor and up would pop a menu:

In the above the white on a black background is the pop up that PopClip offers you. Some of the items on the menu are standard and some are from among the many that others have built.
One in particular is the first asterisk (‘*’) – because I’m too lazy or unskilled to create an icon – which is the PopClip extension I built.
Click on the asterisk and you get:
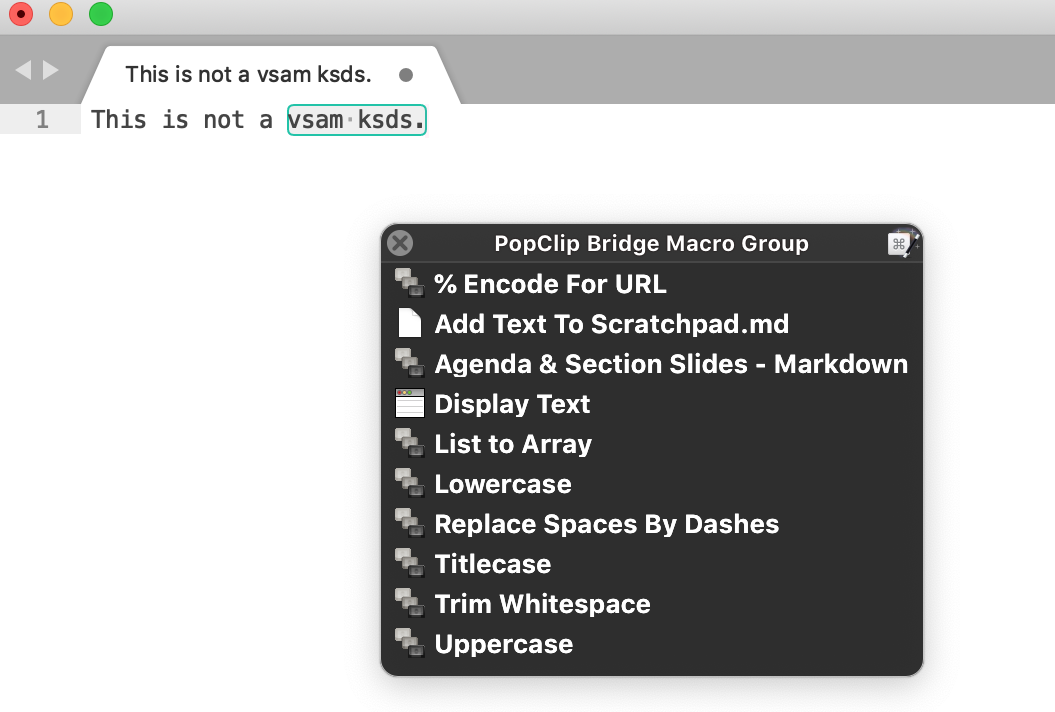
Under the banner ‘Popclip Bridge Macro Group’ you see a whole palette of macros you can choose from.
If you choose ‘Uppercase’ you would get:
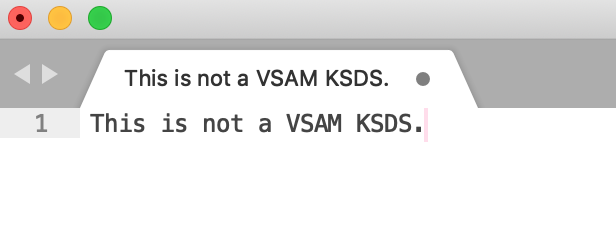
The result of the text transformation is typed in over the selected text.
Now, Uppercase is built in to PopClip. (It’s the ‘AB’ icon.) But that’s just a simple example. You could do anything you please with the text.
How Was This Built?
The first thing to say is that you could build some of this without Keyboard Maestro – though the palette of actions in the second graphic wouldn’t be possible.
The automation consists of three pieces:
- A PopClip extension that invokes a Keyboard Maestro macro.
- This Keyboard Maestro macro that pops up a palette, which enables you to select another Keyboard Maestro macro.
- The Keyboard Maestro macros that can be invoked from the palette.
I’m going to describe how you build all three.
The PopClip Extension
A PopClip Extension is a zip file, containing at least two other files. Its extension is ‘popclipext’. Let me show you how simple it is.
There’s a simple XML file:
<?xml version="1.0" encoding="UTF-8"?>
<!DOCTYPE plist PUBLIC "-//Apple//DTD PLIST 1.0//EN" "http://www.apple.com/DTDs/PropertyList-1.0.dtd">
<plist version="1.0">
<dict>
    <key>Actions</key>
    <array>
        <dict>
            <key>AppleScript File</key>
            <string>KMBridge.applescript</string>

            <key>Title</key>
            <string>* </string>

            <key>After</key>
            <string>paste-result</string>
        </dict>
    </array>
    <key>Extension Identifier</key>
    <string>com.KMBridge</string>

    <key>Extension Name</key>
    <string>Keyboard Maestro Bridge</string>
</dict>
</plist>
This is called Config.plist.
The other file is even simpler, being a basic AppleScript script:
tell application "Keyboard Maestro Engine"
    do script "PopclipKeyboardMaestroBridge" with parameter "{popclip text}"
end tell
Its name (pointed to in an obvious way in the XML) is KMBridge.applescript.
Note {popclip text} is substituted for by the selected text when the PopClip menu was popped up.
You can create these two files with any plain text editor, add them to a zip file and rename that zip file to have the extension ‘popclipext’.
Which is why I haven’t attempted to furnish a single file for you to download.
In fact I want you to feel free to edit the file: Go ahead and cut the above two from this page and paste them into your editor as Config.plist and KMBridge.applescript. Then zip them up into a file with extension ‘popclipext’. If you double click on this it will – possibly after a warning – install the extension into PopClip.
More information on this topic is available here. And, of course, you can get PopClip extensions to do much more, using various scripting languages, for example Ruby or Shell Script.
Keyboard Maestro Macro To Show A Palette
In the AppleScript above a Keyboard Maestro macro ‘PopclipKeyboardMaestroBridge’ is invoked and the selected text passed to it.
You could run any macro you like at this point. Here’s one to pop up a palette and pass the text along:
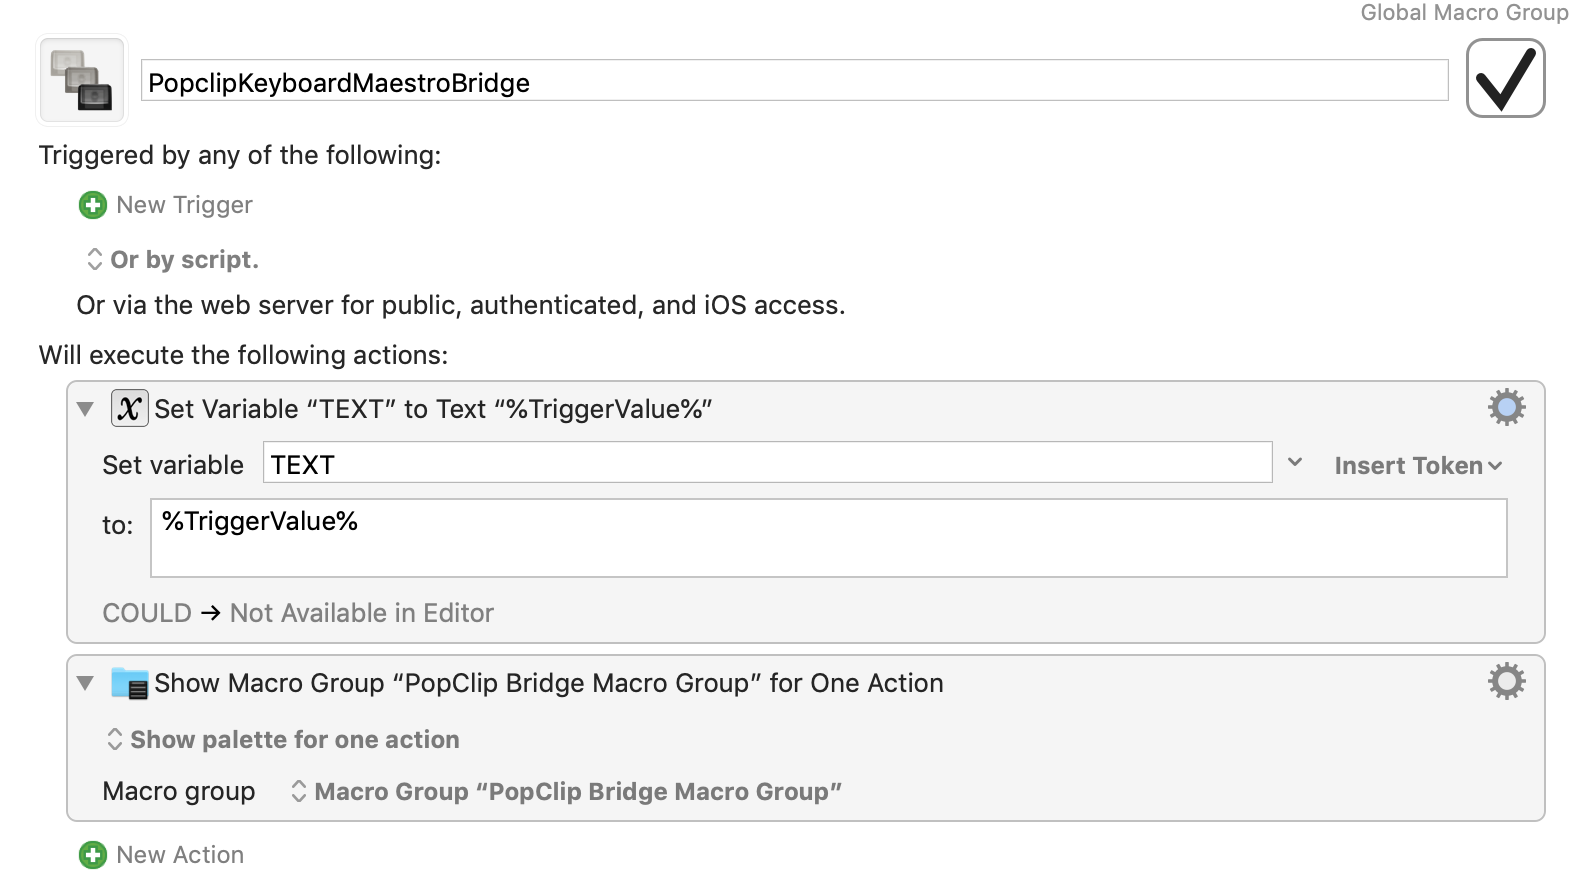
It’s very simple, only having two actions:
- Save the text passed in into a variable ‘TEXT’
- Show a palette with a bunch of macros listed.
The second one produces the palette of actions you saw earlier. For a macro to appear it has to be placed in macro group ‘PopClip Bridge Macro Group’. In Keyboard Maestro users generally group their macros into groups.
By the way, you can cancel out of the palette by pressing the ‘Esc’ key.
Example Macro For The Palette
Let me show you the ‘Uppercase’ macro, as a simple example. It also comprises two steps:
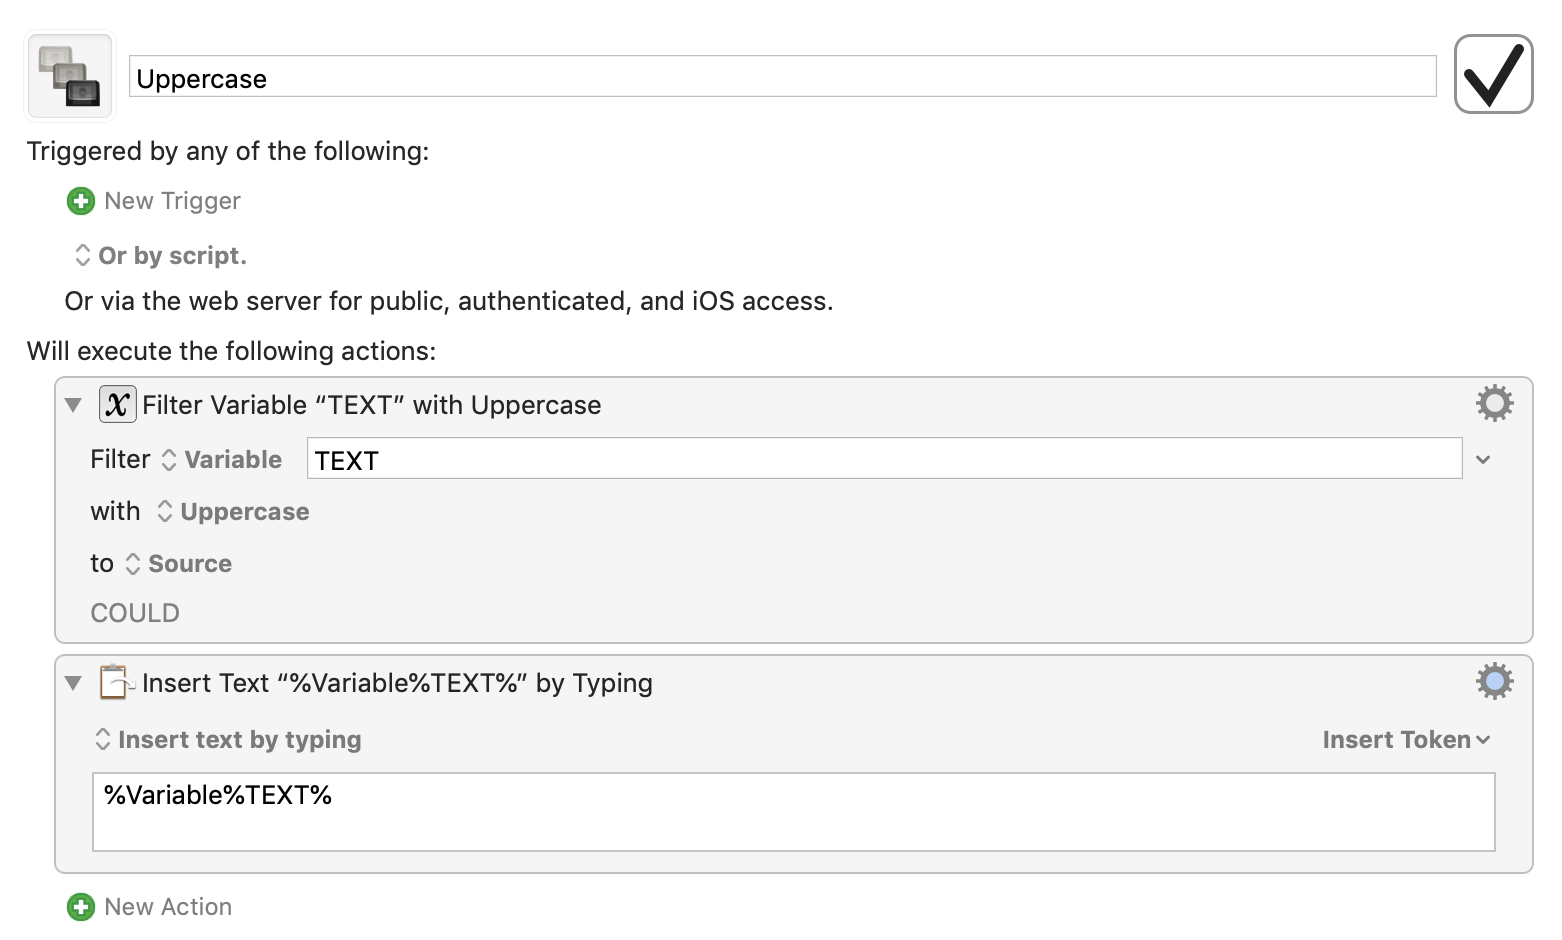
Here are the steps:
- Convert the input text to upper case and store back in the variable ‘TEXT’.
- Type the contents of the variable ‘TEXT’.
All very simple.
In fact I have more complex examples, including:
- Appending the text to a specific ‘scratchpad.md’ file in DropBox. This uses a template that embeds the date and time as a Markdown heading.
- Turning a set of lines into a (javascript) array of strings.
Conclusion
Hopefully the above has served two purposes:
- Proved a useful tutorial in how to build a simple PopClip extension that invokes some Keyboard Maestro functions
- Given people unfamiliar with PopClip and Keyboard Maestro a sample of what each of them can do, and how they can usefuly work together.
In a sense this post follows on from Automatic For The Person.

One thought on “Invoking Keyboard Maestro From PopClip”